PO Position Hierarchy in Oracle Apps
1. Navigate to Purchasing Super User->Setup->Organizations->Financial Options and click on Human Resources Tab.”Use Approval Hierarchies” option should be enabled to use Position Hierarchy.

2. Navigate to Purchasing Super User->Setup->Personnel->Jobs and create new Jobs.

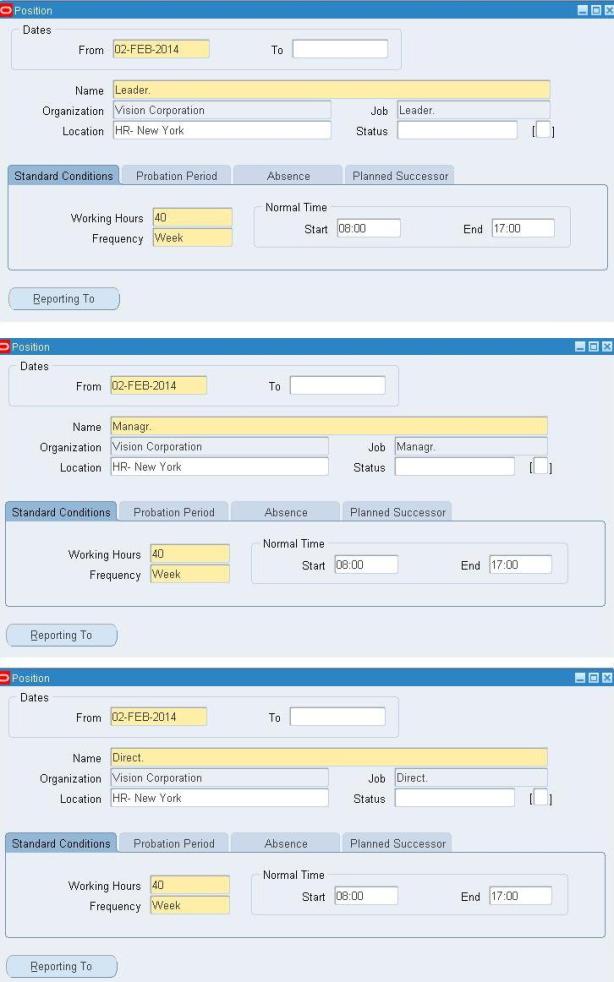
3. Navigate to Purchasing Super User->Setup->Personnel->Positions and create new Positions.
4. Navigate to Purchasing Super User->Setup->Approvals->Approval Groups and create the Approval Groups.

5. Navigate to Purchasing Super User->Setup->Approvals->Approval Assignments and do Approval Assignments for all 3 positions we created.

6. Navigate to Purchasing Super User->Setup->Personnel->Employees OR HRMS Management->HRMS Manager->People->Enter and Maintain and then assign the newly created Positions to the existing or new Employees.

7. Navigate to Purchasing Super User->Setup->Personnel->Position Hierarchy,Enter the new Position Hierarchy Name and Save.
Then Query our Position that has highest approval limit under Position section.
Now enter the position that has next highest approval limit under Subordinates section.
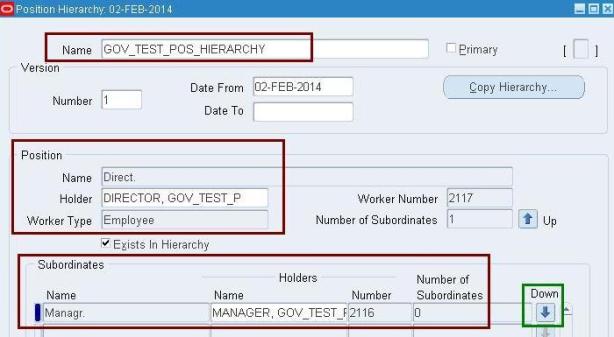
Click on the Down button.Then Previously entered Subordinate Name will go to Position Section and now we can again enter next Subordinate which is under that Position

8.Navigate to Purchasing Super User->Setup->Purchasing->Document Types and set Default Hierarchy as newly created Position Hierarchy across which all document types required.(Here we have set “Purchase Requisition” document type)

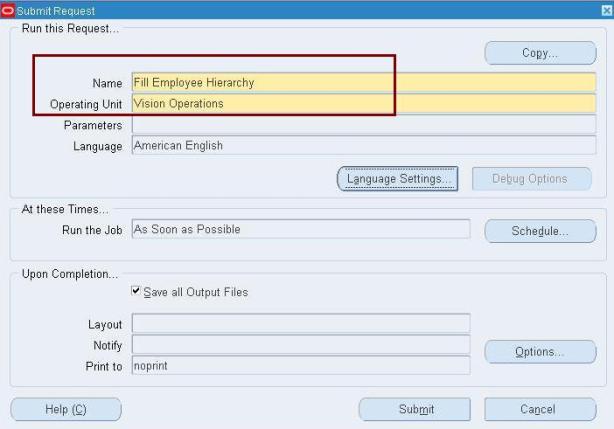
9. Submit concurrent program “Fill Employee Hierarchy” from Purchasing Super User.
10. Now when we create a requisition within the limit of Top Approver(Our case Position-Direct) all the approvers will come in approval list.


2. Navigate to Purchasing Super User->Setup->Personnel->Jobs and create new Jobs.

3. Navigate to Purchasing Super User->Setup->Personnel->Positions and create new Positions.

4. Navigate to Purchasing Super User->Setup->Approvals->Approval Groups and create the Approval Groups.

5. Navigate to Purchasing Super User->Setup->Approvals->Approval Assignments and do Approval Assignments for all 3 positions we created.

6. Navigate to Purchasing Super User->Setup->Personnel->Employees OR HRMS Management->HRMS Manager->People->Enter and Maintain and then assign the newly created Positions to the existing or new Employees.

7. Navigate to Purchasing Super User->Setup->Personnel->Position Hierarchy,Enter the new Position Hierarchy Name and Save.
Then Query our Position that has highest approval limit under Position section.
Now enter the position that has next highest approval limit under Subordinates section.

Click on the Down button.Then Previously entered Subordinate Name will go to Position Section and now we can again enter next Subordinate which is under that Position

8.Navigate to Purchasing Super User->Setup->Purchasing->Document Types and set Default Hierarchy as newly created Position Hierarchy across which all document types required.(Here we have set “Purchase Requisition” document type)

9. Submit concurrent program “Fill Employee Hierarchy” from Purchasing Super User.

10. Now when we create a requisition within the limit of Top Approver(Our case Position-Direct) all the approvers will come in approval list.

No comments:
Post a Comment