For better understanding, this is split into 5 major stages.
Wednesday, May 13, 2020
Friday, May 8, 2020
Define Bank: in oracle apps r12 ;Define Bank;Define Grants and Roles;Setups for Defining the Banks;Define Branch;Define Bank Account;Add Operating unit to your bank;Defining Internal Bank Accounts;Defining Customer Bank Accounts
Define Bank:
You can define a bank or a clearinghouse. Define Banks to record internal banks, where you are the account holder of a receipt and/or disbursement account. If you use Payables, you can define external
banks where your suppliers are the account holders. Also, if you use Oracle Receivables, define banks to record external banks where your customers are the account holders of disbursement accounts. Define
Clearing Houses to record banks that process a magnetic tape of your receipt information, which you send to them. These clearing institutions then create tapes of your customer receipt information, which they forward to each of your remittance banks.
Setups for Defining the Banks
1.Define Grants and Roles:
Navigation: User Management --> Role & Role Inheritance.
Select the User Management Responsibility.
Click on Roles & Role Inheritance.

Enter Type, Category and Name of the payable responsibility name and click on GO.

Click on Update.
Click on Security Wizards.
Click on Security Wizards.

Click on Save and Proceed.
Click on CE UMX Security Wizard.
Click on CE UMX Security Wizard.

Click on Add Legal Entities.

Select Bank Account Grants Use, Maintenance, Bank Account Transfers, and then click on Apply.

Click on Apply.
2. Define Bank.
Navigation: Payable Manager --> Setup --> Payments --> Bank and Branches.
Click on Bank tab.
Click on Create.
2. Define Bank.
Navigation: Payable Manager --> Setup --> Payments --> Bank and Branches.
Click on Bank tab.
Click on Create.

Enter the Country and Bank Name and then click on Save and Next button.

If you want enter the bank address then enter required the information.

Click on Save and Next.
If you want enter the contacts details of the bank then enter the information.
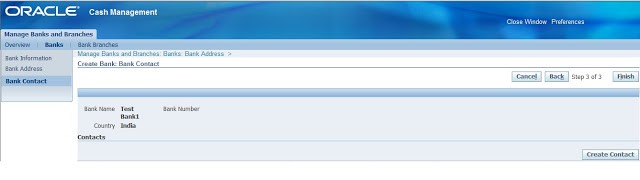
Click on Finish
Define Branch:
Click on Create Branch.
Define Branch:
Click on Create Branch.

Click on Continue.

Enter Branch Name Branch Type and then click on save and next button.

Enter the branch address details and then click on save and next button.

Enter the branch contact details and then click on Finish .

Define Bank Account:
Click on Create Bank Account.

Click on Continue.

Select the Legal entity and Enable modules, which we want to use this bank account.
Click on Next.

Enter the Bank account Name, Number and currency and then click on save and next.

Enter the cash and cash clearing accounts and then click on save and next button.

Add Operating unit to your bank
Click on Add Organization Access.

Enable Account use for Payable, Receivables, Organization Name, and then click on Continue.

Click on Apply.
Click on Finish.

Defining Internal Bank Accounts:
You define internal bank accounts to define bank accounts for which you are the account holder. Oracle Receivables uses internal bank accounts to receive payments from customers. Oracle Payables uses
internal bank accounts to disburse funds to suppliers.
Prerequisite
§ You
have installed Oracle Receivables.
§ Define
custom payment formats for Payables payment documents
To define a basic bank account for receipts:
1. In the Banks window query an existing Bank.
2. Choose the Bank Accounts button. Enter the Bank Account Name and Bank Account Number. Optionally enter an Account Type and Description.
3. If you want to use Bank Account validation, enter Check Digits.
4. Select Internal Account Use.
5. In the GL Accounts region, enter a Cash Account.
6. In the Receivables Options region, enter GL Account information for Remitted Receipts, Factored Receipts, and Short Term Debt.
7. In the More Receivables Options region, optionally enter Receipt and Discount GL Account information.
8. Optionally enter the contact information in the
Contact region.
9. Save your work.
9. Save your work.
Prerequisite
§ You
have installed Payables
To define a basic bank account for
disbursements:
1. In the Banks window query an existing Bank.
2. Choose Bank Accounts. Enter the Bank Account Name and Bank Account Number. If you will use this bank for payments you make with the EDI Gateway, enter an Account Type. Optionally enter a Description. The currency defaults from your functional currency. If you want to use Bank Account validation, enter Check Digits.
3. Select Internal Account Use.
4. In the GL Accounts region, enter a Cash Account.
5. In the Payables Options region, enter default information for your payment batches. Record whether you allow zero–amount payments and whether this is a pooled account.
6. Optionally enter the contact information in the Account Contacts region.
7. Proceed with Defining and Maintaining Payables Payment
Defining Customer Bank Accounts
If you use Oracle Receivables, you can enter
bank account information for your customers. Receivables use this information
when you receive electronic payments from your customers.
To define a customer bank account:
1. In the Banks window query an existing Bank.
2. Choose the Bank Accounts button. Enter the Bank Account Name and Bank Account Number. Optionally enter an Account Type and Description.
3. Select Customer Account Use.
4. Optionally enter the contact information in the Contact region.
5. Save your work.
Defining Supplier Bank Accounts
You can enter information for bank accounts for which your supplier is the account holder. You then assign these accounts to the supplier and its sites. Payables use this bank information when you create electronic payments for your suppliers.
You can enter information for bank accounts for which your supplier is the account holder. You then assign these accounts to the supplier and its sites. Payables use this bank information when you create electronic payments for your suppliers.
Prerequisite
§ Define
the suppliers and supplier sites that use the bank account to receive
electronic payments.
To define a supplier bank account:
1. In the Banks window query an existing Bank.
2. Choose the Bank Accounts button. Enter the Bank Account Name and Bank Account Number. Enter the EDI ID number. Optionally enter an Account Type and Description. Optionally change the account currency, which defaults from your functional currency. If you want to use Bank Account validation, enter Check Digits.
3. Select Supplier as the Account Use.
4. In the Supplier Assignments region list the supplier, and optionally list supplier sites, that use the account to receive electronic payments.
5. Optionally enter account holder information in the Account Holder region. Optionally enter the contact information in the Account Contacts region.
6. Save your work.
7. In the Bank Accounts region of the Suppliers and Supplier Sites windows, verify for each supplier and site that all appropriate bank accounts are listed. For suppliers and supplier sites with multiple bank accounts, designate as the primary bank account one bank account per period and per currency.
Defining Multiple Currency Bank Accounts
If you define a multiple currency bank account, you should use manual payment reconciliation with it. Payables stores the payment currency you enter when you initiate a Payment Batch, enter a manual payment,
or create a Quick payment. The bank file details you receive from a bank will contain the bank account currency. Since the payment and bank, account currencies could differ when you use multiple currencies
bank account, automatic reconciliation could result in numerous exceptions.
If you define a multiple currency bank account for payments, the currency of the bank account must be the same as your functional currency.
Prerequisites
§ Enable
the Use Multiple Currencies Payables option.
§ Enable
the currencies you need in the Currencies window.
To define a multiple currency bank account:
1. Define a basic bank account for receipts or disbursements.
1. Define a basic bank account for receipts or disbursements.
• If you are defining a bank account for
receipts, in the Receivables
Options region, enable the Multiple Currency Receipts option.
• If you are defining a bank account for disbursements, in the
Payables Options region, enable the Multiple Currency Payments
option and enter Realized Gain and Realized Loss accounts.
Payables Setup 2 – 123
Proceed with Defining and Maintaining Payables Payment
Documents: page 2 – 124. You can define payment documents
that use a payment format with any currency.
2. Save your work.
Defining Foreign Currency Bank Accounts
Prerequisites
q Enable the Use Multiple Currencies Payables option.
q Enable the currencies you need in the Currencies window. See:
Currencies Window (Oracle Applications System Administrator’s
Guide).
To define a foreign currency bank account:
1. Define a basic bank account for receipts or disbursements.
• If you are defining a bank account for
disbursements, in the Payables Options region, enter Realized Gain and Realized
Loss of Accounts.
2. Save your work.
2. Save your work.
R12: AP: How To Assign The Same External Bank Account To Multiple Suppliers
R12 assign same bank account to multiple suppliers
R12: AP: How To Assign The Same External Bank Account To Multiple Suppliers
To assign an existing external bank account to another supplier,
do the following (in a test instance first):
1. Create a new
supplier site (or choose an existing one) using a Payables responsibility.
2. On the left
panel, go to Company Profile -> Banking Details.
3. Create a new
bank account or select an existing one. If you select an existing one, then:
3.1 Click
on the Update icon (for the supplier that owns it).
3.2 Go to
the Account Owners section (should be at the bottom of the page).
3.3 Click
on Add Another Row and add all other suppliers (one by one) that should have
access to the bank account.
3.4 Save
your changes and exit the form.
4. For each of
the suppliers you added in Step 3.3 above, go to their individual supplier
records, and open the Banking Details page. Then follow the steps below:
4.1 Under Bank
Account and Assignment Details select "Site", and in the next field,
enter the search for the new site name and select it.
4.2 Under Bank
Accounts section click Add
4.3 In the list,
the bank account should be displayed.
4.4. Select it.
4.5. If needed,
change the start date/end date.
4.6. Save and
retest
5. If the issue
is resolved, migrate the solution to your production or other environments, as
needed.
Partners might be having a joint account and both of them might be
doing business with or organization. Following are the steps to assign same bank
account information to more than one supplier record in Account payables
When we try to add the same bank account information to the second supplier like normal bank account setup we get the error message as shown in below screenshot
When we try to add the same bank account information to the second supplier like normal bank account setup we get the error message as shown in below screenshot
Step 1: Find
the supplier for whom the bank account already assigned

i)Click On the left panel go to Company Profile -> Banking Details
ii) Select an existing
one and click on the Update icon. Go to the Account Owners section (should be at the
bottom of the page). Click on Add Another Row and add other suppliers that you
would like to use the same bank account.

Step 2:
i) Go to other suppliers, Banking Details section

ii)Under Bank Accounts section click Add

iii) Select bank account
from the list of value and apply

Subscribe to:
Posts (Atom)
-
Approval Management Engine FAQ 1. AME – What is it? i. AME is a simple to use Rules Engine for Defining Approval Policy ii. AME is ...
-
Register Custom Tables in Oracle Apps Say you have a custom table called “ERPS_EMPL...
-
OU & ORG ID & ORG CODE & ORG NAME ================================== select OPERATING_UNIT,ORGANIZATION_ID,ORGANIZATION_CODE...
